TAB INSTRUMENTATION
Air & Hydronics TAB Services Inc. prepares all TAB forms in a custom built form for each project and arranged in an easy to follow, organized format. Our TAB forms let the technician know if something is out of tolerance or any data is missing, thus eliminating return trips and extended time in preparing the TAB Report at the end of projects.
During the testing and balancing procedures A & H TAB Services Inc. utilizes calibrated instrumentation that exceeds the industry standards in order to provide the most accurate results.
All TAB Instruments we use are calibrated with up to date calibration certificates.
 AIR VELOCITY: ± 3% of reading ± 0.036 m/s
from 0.254 to 40.64 m/s using standard Series
160 pitot tube (147.32 m/s FS);
0.254 to 25.4 m/s AirFoil;
0.254 to 12.7 m/s VelGrid.
DIFFERENTIAL PRESSURE: ± 2% of reading ± 0.249 Pa from 12.45 to 12,454 Pa.
TEMPERATURE: ± 0.5°C accuracy from 0°C to 70°C.
AIRFLOW: Accuracy is ± 3% of reading ± 3.3 l/s
from 47 to 944 l/s.
RANGE: 11.8 to 1,180 l/s supply air, 11.8 to 708 l/s exhaust air with a Flow Collection Hood.
ABSOLUTE PRESSURE: ± 2% of reading ± 0.1 in Hg from 14 to 40 in Hg referenced to vacuum.
OPERATIONAL TEMPERATURE LIMITS: 4.4°C to 60°C.
AIR DENSITY CORRECTION: Local air density correction range is 14 to 40 in Hg and 0°C to 70°C.
POSITION SENSITIVITY: Unaffected by position.
 Flow Collection Hood includes various top sizes
Flow measuring base with sensing manifold.
Two position flaps and control.
Push-button handle.
Carrying case.
To get direct flow measurements flow collection hood must be used with a Shortridge Meter ADM-860C.
 Measurement Range: Velocity 50 to 6000 fpm
or 0.25 to 30 m/s.
Temperature: 32 to 140 °F or 0 to 60 °C.
Volumetric Flow Rate: 1-9999000 cfm or 1 – 999999 l/s
Area Input: 0.043 – 900 ft2 or 0.00399 – 90 m2.
Actual range is a function of velocity and area input.
Display Resolution: Velocity 1 fpm or 0.01 m/s.
Temperature: 1 °F or 0.1 °C.
Accuracy: Velocity ±1% reading ±4 fpm
or ±1% reading ±0.02 m/s.
Temperature: ±2 °F or ±1 °C.
Operating Temperature: 32 to 140 °F or 0 to 60 °C.
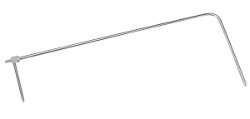 Series 160 – ASME Design Meets AMCA and ASHRAE Codes.
Stainless steel pitot tube with 5/16” diameter.
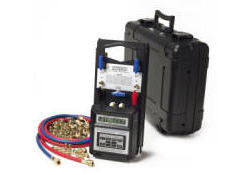 Direct digital readout in English and metric units. Pressure displayed in PSI, Ft HD, IN WC and in HG KPA, MHD, MMHO and MMHG.
Temperatures displayed in degrees F & degrees C.
Auto Range.
Broad range: 0-250 PSI or 0 -1,724 KPA.
100 Readings – Memory.
3 in 1 reading: P1, P2 & pressure differential.
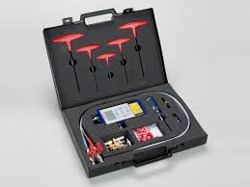 Database of over 2900 valves from 54 manufacturers worldwide including a unique automatic balancing valve assessment option.
Flow/Pressure display—shows valve type, KVS value, hand wheel setting (Variable orifice), Differential pressure, Flow, valve maker, valve type, valve size. Flow and Pressure are shown in large text format.
Measurement Accuracy:
Differential pressure: Range 0.3-1KPA accuracy +/-0.03 KPA.
Range 1-10 KPA accuracy +/-0.05 KPA.
Range 10-250 KPA accuracy +/-0.5% reading.
Hysteresis 0.2% span. Measurement Range: 0.1 KPA to 250 KPA.
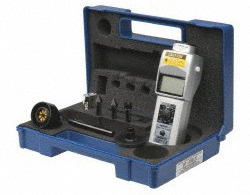 Measuring range with non-contact – 6 to 99,999 RPM.
Contact – 0.8 to 25,000 RPM.
Accuracy: 6 to 8,299 RPM ±1 RPM
8,300 to 24,999 RPM ±2 RPM
25,000 to 99,999 RPM ±0.006% RPM
Measuring distance: 14 feet (4.2 m) maximum.
Detection: laser diode, class II.
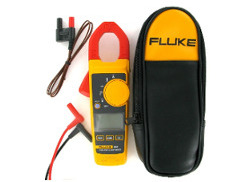 AC current range: 40.00 A/400.0 A
Accuracy: 1.5 % ± 5 digits (45 Hz to 400 Hz)
AC voltage range: 600.0 V
Accuracy: 1.5 % ± 5 digits.
Resistance range: 400.0 Ω/4000 Ω.
Accuracy: 1 % ± 5 digits.
AC response: True-rms.
Contact temperature: -10.0 °C to 400.0 °C.
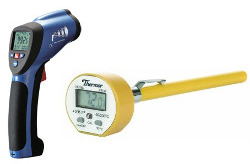 Measurement Range: -100°C to 300°C; -148°F to 572°F.
Resolution: 0.1°C or 0.1°F.
Accuracy: 0.01% of reading + 0.03°C – varies for different thermometers makes & models.
